Forums › Other Lasers › Misc. Laser Forum › Microscope tips.
- This topic is empty.
-
AuthorPosts
-
Robert Gregg DDSSpectatorDavid,
Of course Glenn is the expert at this.
But unless you see well and naturally in 3-D like Del McCarthy, it will take some time and practice. The more you practice, the sooner you will feel comfortable. It took me 2 1/2 years to feel comfortable–but I was avoiding using it except for endo.
Basic operative I use at 3.5 or so.
I have no special mirrors, but I keep a supply of new and non-dinged ones in my draw in the operatory that I use for microscopy and photography, and send the beat-up mirrors thru the tray set-ups. I have Liz handle he microscope ones separately–it’s worth it.
I don’t have my assistant work off the monitor, but many will have separate binoculars for them to work thru.
Let’s ask Glenn!
Good luck,
Bob
Glenn van AsSpectatorWait til I am sober tomorrow………..
Been a long night with family and friends.
Will answer tomorrow.
Glenn
Glenn van AsSpectatorOk …….a few less brain cells later……..
It does take time to master the microscope and there are so many things that I can tell you but the basics are :
Operator Position : in the beginning try sitting in the 12 oclock position for all quads except the lower right which at times I sit at the 9 oclock position (especially for a crown prep).
Patient position : For the upper the patient should be parallel to the floor (ie horizontal) for the mandible I raised the patient slightly 20-30 degrees sitting upright. This effectively can provide for a better direct view without mirrors on the occlusal surface of the molars.
Patients Head position: THis is one of the keys. The patient must move their head to either side alot more than with loupes. If I am looking at the lingual of the lower right molars……with loupes I will bend my torso to the left and look straight down. WIth the scope what I do is move the patients head to the right and that way I can have a better look at the lingual. For the upper arch you always (or almost always) need mirrors. Even veneer preps in the anterior I like the view looking down the long axis of the tooth from the incisal with the mirror to see exactly how much tooth structure you can take off. For the lower arch I often try a direct view wherever possible because I still find it difficult to practice with mirrors in the lower arch. If you can do indirect views then you will practice in a much more ergonomic fashion on the lower arch than I do.
Mirror position: We break this up into upper and lower arches and right and left sides of the tooth. THe occlusal surface of the molar is the watch face with 12 oclock pointing towards you and 6 oclock pointing to the foot of the chair.
Maxilla:
Left side of the tooth : 1 oclock and 3 oclock for mesial and distal surfaces of the tooth. 6 oclock for the occlusal although this can vary if you want to get the mirror out of the splatter zone you can move it further away and focus on the mirror.
Right side of the tooth: In the maxilla this can be tricky as the handpiece when preparing the palatal of the left quad can get in the way. Have to push the mirror up higher into the vault of the maxilla to see but basics say
9 Oclock and 11 oclock for mesial and distal and 6 oclock for occlusal.
Lower Arch: When you need mirrors ( I try to do direct) then you use the following
Left side of tooth: 3 oclock and 5 oclock and 12 oclock for the occlusal view.
Right side of the tooth: 7 oclock and 9 oclock for the mesial and distal and 12 oclock for the occlusal.
I try to work at low mag for many things in the beginning to get my hands used to the scope. David and Ron , tomorrow I will send you a little gift.
I hope it will help you. FOr crown preps I often have to do gross reduction at low powers, marginize at high powers with three separate movements to see different segments of the prep and then back of to low power to see the line of draw, parallelism or lack of undercuts.
Hope that starts you off with positioning.
Mirrors wise ……Hartzell makes a Cone socket handle which has two ends and I put a small mirror in the one end (size 0) and a larger one in the other end (2-4)
THe small mirror combined with small surgical suctions (they take up less space) allow for you to get your handpiece, mirror and suction in the field of view. The mirrors work well at high mag and for limited opening or posterior teeth in the maxilla.
The depth of field at high mags if very small. Remember that with loupes you will find that your head makes the minor movements to keep things in focus. Not possible if the scope is fixed. SOmetimes I can bump the headrest slightly upwards with my leg to keep things in focus without stopping to adjust the scope.
I started doing most of my restorative work at 2.5X power when I got the scope because for me this was a mag I was used to with my loupes. You are at 6X power David so you are used to working at that mag. I know work at 10X mag for most things and bump it up when needed or downward to view multiple crown preps, putting on the rubber dam, placing anesthetic etc.
10X is my usual mag.
Mirror scratches jump out at you and I just replace them more often now, they arent that expensive and as mentioned I have a variety of mirrors available.
The assistant in my office LOVES the monitor. ITs absolutely vital to the success of 4 handed dentistry as you need to have the assistant know when she is in the way.
One last tip……if you are constantly staring at the back of the handpiece try
1. tipping the handpiece angle one way or another instead of perpendicular to the tooth.
2. Use surgical length burs (this works great).Your learning curve will not be magnification related (you already have that down) but it will be positioning of the microscope related.
Hope that starts you off with some nuggets. My suggestion is print it out……you will be surprised when you use the scope more and more how little things I mentioned above help.
See ya
Glenn
dkimmelSpectatorGlenn , thanks. Looking froward to Monday morning.
David
Graeme MilicichSpectatorDavid
Glen touched on one point in his excellent post.
The shallow depth of field at higher mags.I have a chair with a foot controlled lever that allows me to bump the chair up and down. So I establish correct working position and get the patient all lined up, then if I am changing from working in a mirror to going direct, there is a change in focal point, so I simply bump the chair height up or down a tad with the footswitch. It is only a cm or 2.
This saves you having to fiddle around moving the scope or playing with focus settings on the scope. Real quick and easy little trick that adresses one of the potential frustrations encountered when learning to use a scope.
Cheers
dkimmelSpectatorBob, Glenn and Graeme your tips were most helpful.
I could not get my mother inlaw to come into the office this weekend to work on. She had back sx a month ago and felt it would have been tooo much. I even tried telling her it would be for free. Wimp!!!I did give the scope a try today. I started off with endo on #13, 10 L, 21 DOF and 6F.
Holycow the scope rocks! I can not believe it has taken me this long to try it out. I tought I could see with the X6 loops. Endo is cool with the scope. Just being able to see made making the access much easier.The restorative was more a challange. I had no problem getting used to the magnification or hand eye coordination. The kicker was postioning the patient and postioning the mirrors.
One concern I have had with getting the scope was you have this thing hanging over the patient. The 3 patients I worked on said they prefered it. They said the light did not bother them as much as with the overhead light. The light is pretty cool. One of the patients husbands came back and watched the proceedure on the monitor. He was really impressed with what it takes to do a filling. I was thinking the whole time. “Hope I don’t screw up cause this guy is watching the whole thing.”
Things I liked so far.
-The light
– Being able to see. I was using .75 W and could easly see the albation.
– Keeping my back & neck straight.
– the assistant could see the full procedure.
– Patient or spouse interaction with the procedure.
– I am sure there will be more to follow.What I did not like.
– More stuff in the op.
– Hating the way my restortive looks at higher maginfication.
– Keeping my back straight. The muscles in my back ache from setting up straight.
– Mirrors. Dam things. I have been doing more direct vision work then I thought. Need to practice more.
– Seeing double can be tough. That is seeing the image in the mirror and the the actual object in the same field. It really made me focus on what I was doing. No daydreaming about sailing.
– Difficulty in gauging the distance of the laser tip to the tooth under higher maginifaction.
-listening to Glenn say I told you so.
I know the dislike list is longer then the like list but the value of the like list for out weighs the dislike. That and I feel the dislikes are just a matter of experience.
Got to go play with the scope. Thanks for the tips!
David
Lee AllenSpectatorDavid,
Another one bite the dust. Another one bites the dust.
AHHHHHHHHH!
Loupes forever!
Graeme MilicichSpectatorDavid
your comment about two images in the filed, the mirror and the actual object,
Make sure if you are working in the mirror that the mirror is in the centre of your field of view. That gets rid of the problem with the primary object capturing your attention.In case someone hasn’t metioned it, make sure you are using surface reflector mirrors.
Cheers
dkimmelSpectatorDay two was not as much fun as day 1. First off I only was able to do one case. It was a direct comp veneer on #10. It was a great case to do as it was in the front plus it forced me to use the mirrors for the lingual and looking at the facial contours from the incisal.
I am getting used to moving the patient around. the design of the Ziess scope had to have been for endo. Ergonomicaly it is a bite tough for restorative. That and using barriers is a pain. There is no way to put a barrier on the filter for te UV light. The knobs are also not designed well for barriers. I guess they think you can bag the whole thing but that is combersome.
The hard part is making any adjustments you have to move your hands out of the working zone. Again I realize this is experiene related.One thing I found out real fast is the light source is not color corrected. Can we say yellow!!! Not a great idea to do shading with the scope. At least with the light source the Zeiss has. This I find real fustrating as maginfication is ideal for picking up maverick colors. It will be interesting looking at other scopes.
I tried capturing video. It was tough trying to get a good color balance on the monitor. The laser also caused big time interference. The kicker was my computor came up short on memory for some wave something or other… Got to work on that.
Looking forward to day 3.
Thanks again for the tips . They do help. Glenns pointers on the mirror postions made no sense on day 1 but today it was coming together..
David
whitertthSpectatorStefan Luger who I think is brilliant when it comes to scopes taught me a neat trick…I unlock the chair lock so it can swivel and I swivel the chair with my knees which helps in the left to right alignment of the patient…try that tomorrow david its really a cool tip…
Ron( Listen to me giving microscope advice) Kaminer
Glenn van AsSpectatorGreat tip Ron…..that is very useful and I too have my chair unlocked.
David we use chair bags and tie up the whole scope.
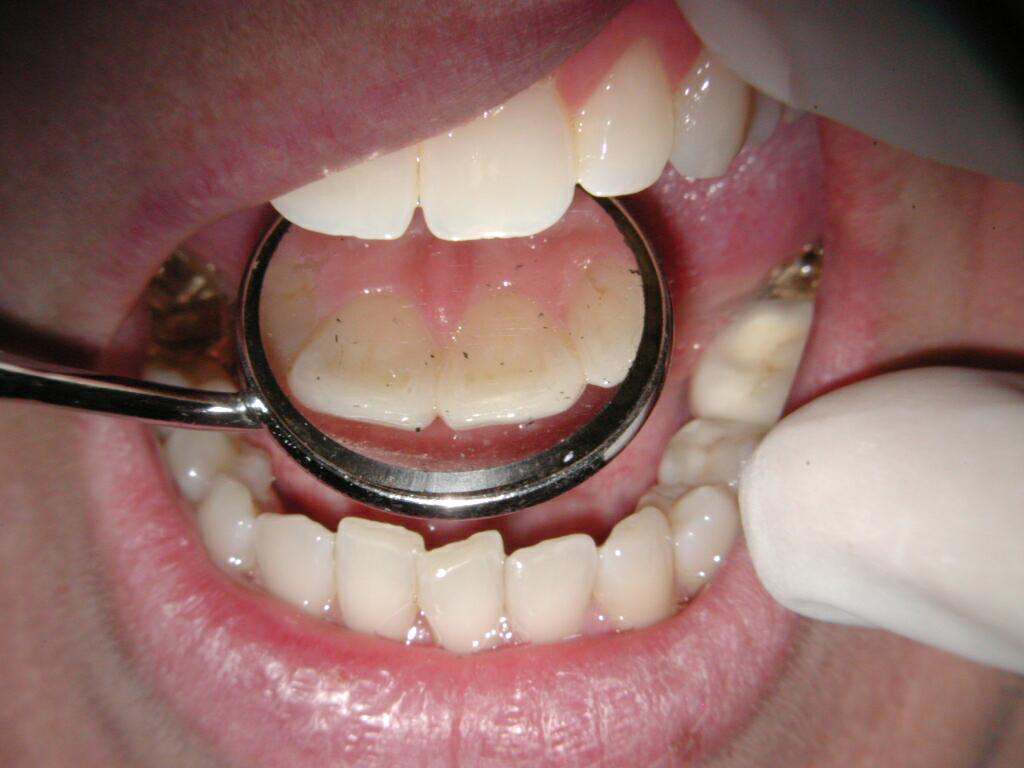
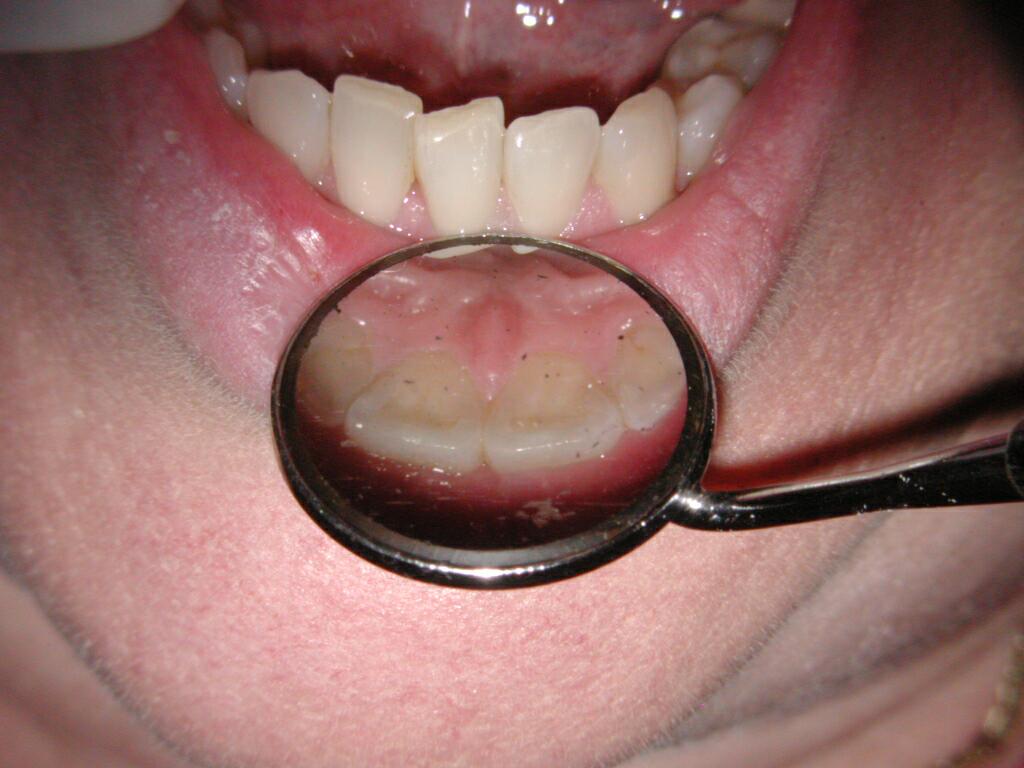
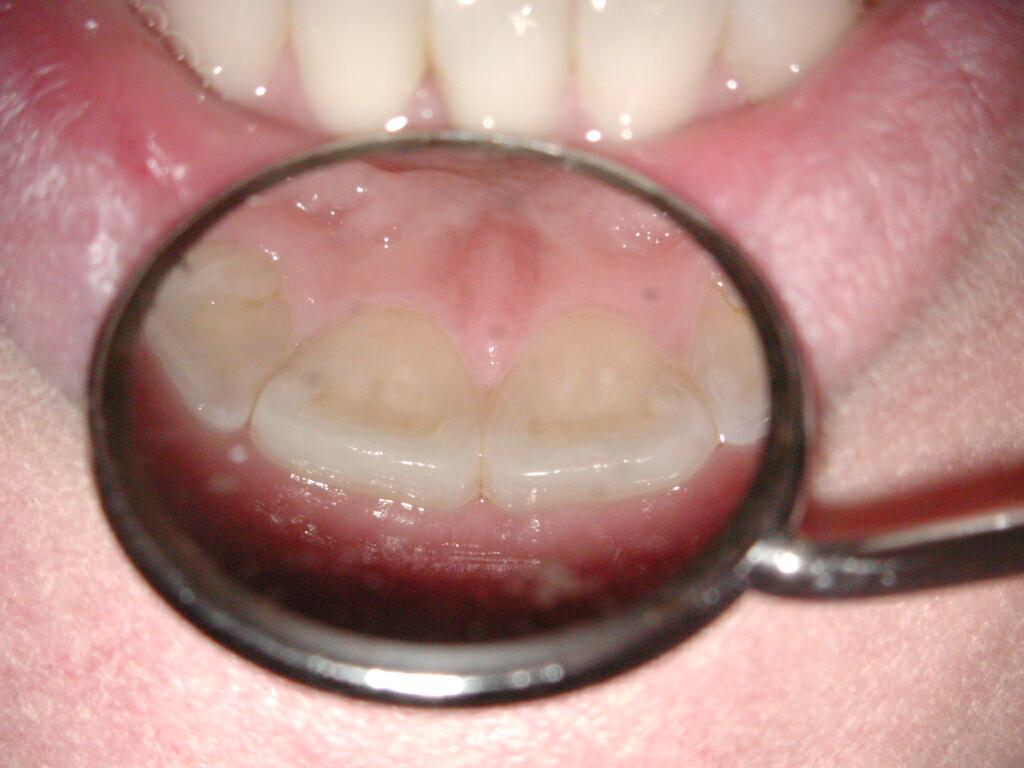
For the lingual of the maxillary centrals, one really cool thing you can do is move the mirror to the lower lip (instead of directly behind the tooth) and this will help you cut the prep on the lingual without getting any splatter on the mirror.
The first pic is the typical position for the mirror.
The second is what you can do with the scope (low mag picture to show position of the mirror on the lower lip).
THe third pic is the same photo as #2 but I have bumped the mag on the mirror from 2.5 to 10X power.
It is as if you are on the lower incisors looking straight up.
Cool huh……..
I have included some photos of this procedure. It is one of the coolest tips I can give someone.
Another tip….ALWAYS KEEP ONE HAND IN THE OPERATING FIELD, as your other hand can always find its way back easier. (If you close your eyes you can touch your fingers together and you can use this stereotactic coordination to find your way back to the super magnified field as long as you keep your left hand in the operating field)……unless of course you have been imbibing at HOOTERS the night before.
I gotta go pack……I leave in 6 hours.
Cya
Glenn
dkimmelSpectatorDay 3.
Some great tips guys!Today was a crown prep on #21.
Fustration was the word for the day. I did the prep with the HP instead of the laser due to a very large alloy. It was tough to see. I never could get a good view of the margin with the HP in place. This is going to take a while. I ended up using my loops for most of the prep and then checking it with the scope ,trying to refine it some.David
Graeme MilicichSpectatorDavid
My guess is you are used to having the mirror right in line with the long axis of the HP. This doesn’t work with the scope (as you have found out)
I found it easier to start with simple stuff with the scope and “move up” to the more demanding work once I had come to grips with the basics.Endos are really good to play around with the scope. Try doing your axams under the scope as well. You get really good at sorting out the correct positions when you have to work around a whole mouth in one appointment.
With crown preps you have to get the mirror out of the long axis of the HP.
Sometimes to accomodate your needs, your assisitant has to change her position as well. If your nurse is bullying you out of where you need to be so you can see, you might have to discuss other positions for her to palce the suction in. Because you are so focused on what you are trying to achieve, you may not be aware that your sidekick is contributing to the problem.
Just another thought
Cheers
ASISpectatorHi David,
Congrats on your journey into microscope enhanced dentistry. Consider getting Glenn’s DVD on microscope. It will help both you and the staff.
Regards,
Andrew
whitertthSpectatorJust spent a day with Stephan Luger…one of the motknowledgeable non dentists in the microscope field…Stephan, increased my knowledge with specific pointers and redirected my posture today . Posture is so critical with scopes it can make u or break u..If any of u need asistance…call Stephan he is well worth the money….If u r looking in to buying a scope call him as well….He is a dealer for Seiler but dosent care realy which one u buy he can train u on any…..
-
AuthorPosts